Hi friends! This post may contain affiliate links, meaning I may receive a small commission if you shop through these links at no extra cost to you. Thank you for supporting me through these links! For more information, check out the disclaimer here.

As many of you who know me in real life know — I’m obsessed with hockey. Like many 16 year olds do, I had a crush on a boy in high school who loved the Flyers, so I started to watch the Flyers. Twelve years later, the boy is long gone but the crippling obsession with Flyers hockey remains. Unfortunately, now that I’m in DC, my love for the Flyers has had to make room for a fondness for the Caps, but after 5 years I’ve managed to make them coexist.
Anyway, back to the Ikea hack. This past winter I moved in with my boyfriend Rob, who naturally is also obsessed with hockey. Rob has lived on his own a few times in his life, but due to the astounding cost of living and my need to stay in a major northeast city, I haven’t. He wanted me to do pretty much anything with our place as far as styling so I could finally have a home that feels like my own.
So having a totally blank slate to start, I wanted to make sure I injected elements of my style to our apartment while still making sure it felt like *us* — not just any room in a magazine where people don’t actually live. My first thought in doing that was to make some hockey-themed home decor!
Unfortunately, and if you’ve been down this road before you know, most sports-related home decor is…pretty ugly. It’s the stuff built for “man caves” and garages and doesn’t exactly scream “boho chic.” So what do you do when you can’t find the item you want? You DIY it, obviously.
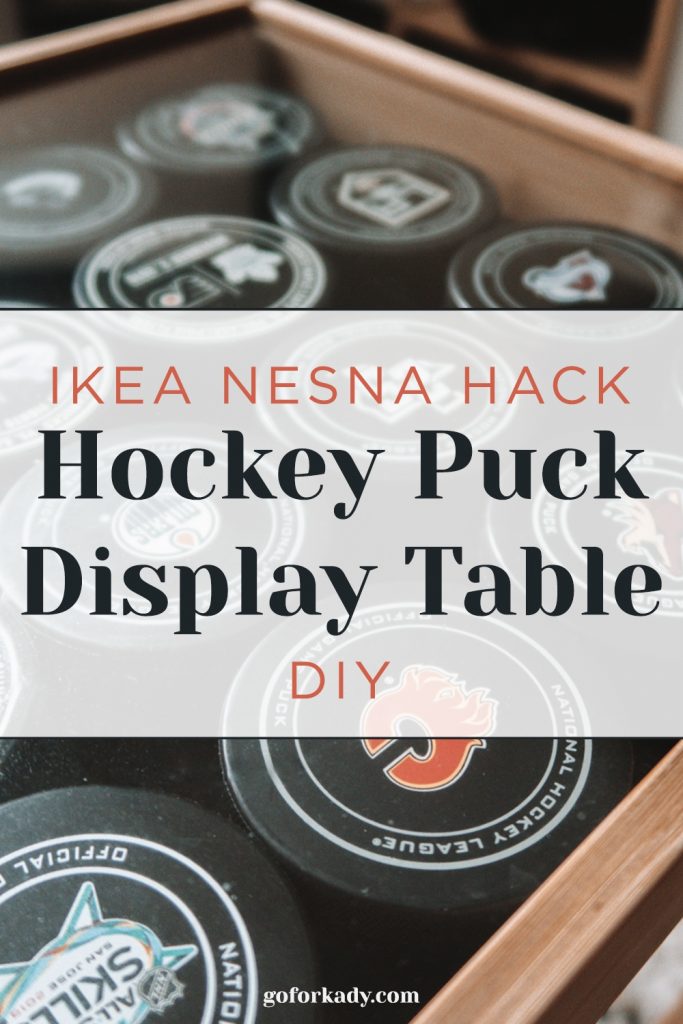
After being inspired by this Ikea side table hack from The Sorry Girls, I thought I could take the concept of hacking the Nesna Nightstand and turn it into the perfect hockey-themed decor piece for our apartment. Turns out I was right!
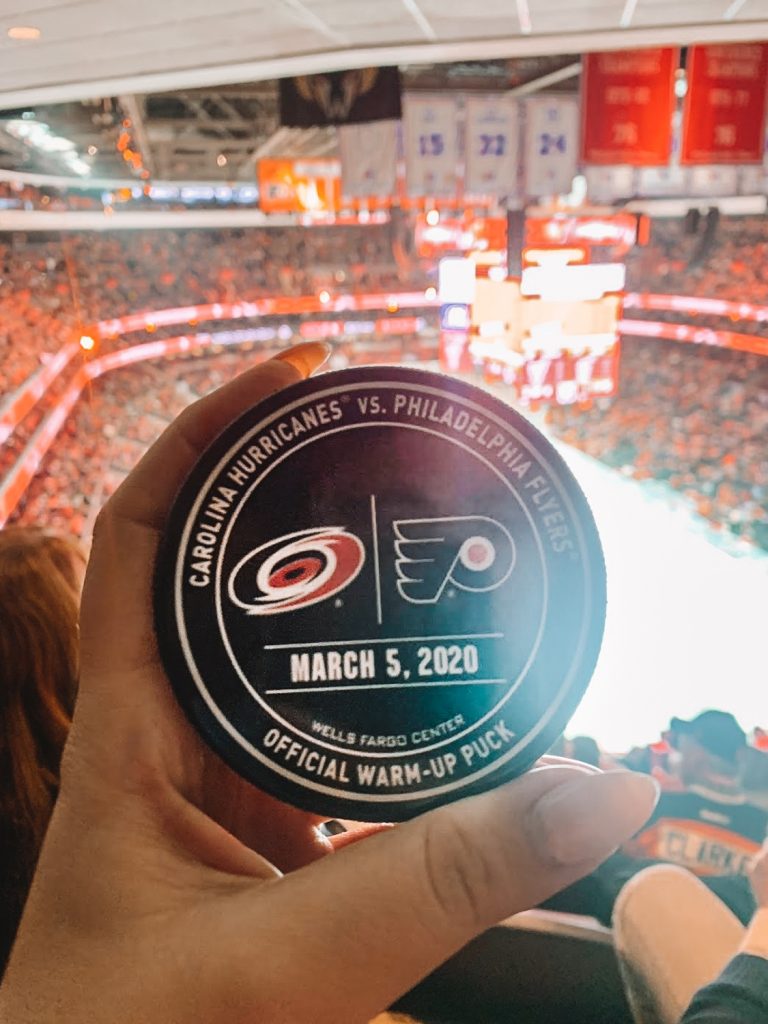
Rob has been collecting hockey pucks from games across North America for years, and since we’ve been together we started collecting pucks from important games that we went to together as well. I thought I could take the Sorry Girls concept and use it to make my own DIY hockey puck display table, so our home could have some sports-related decor that was actually cute, and fit the look of our apartment. On to the tutorial!
What You Need to Build Your DIY Hockey Puck Display Table
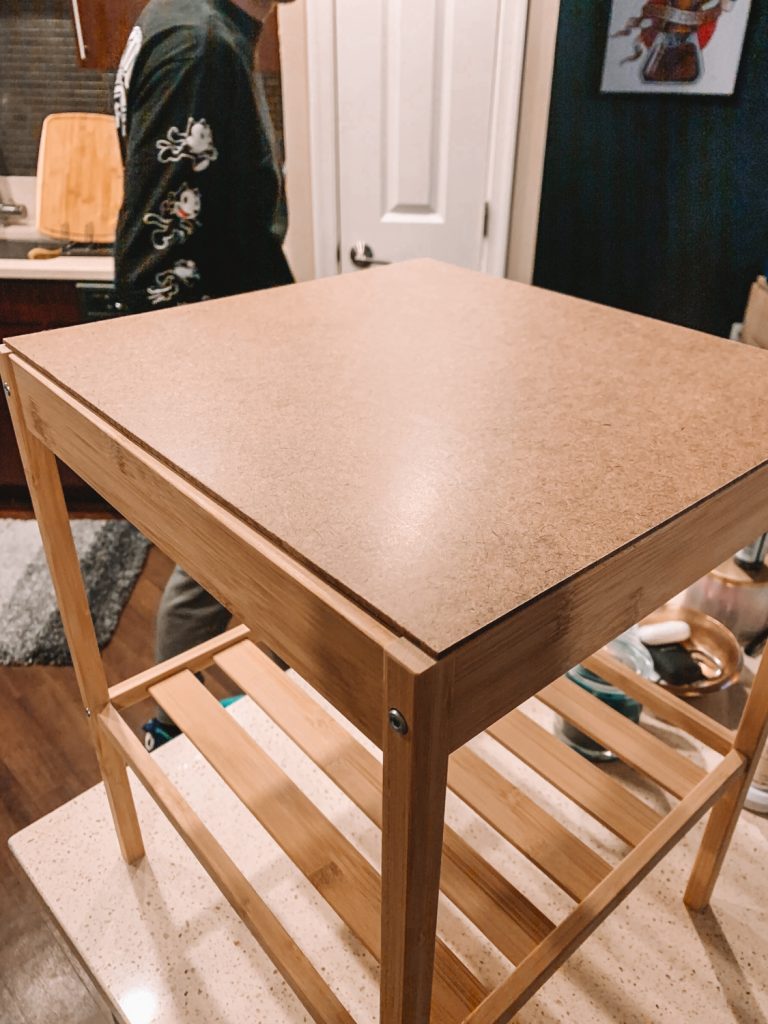
1. Nesna Nightstand
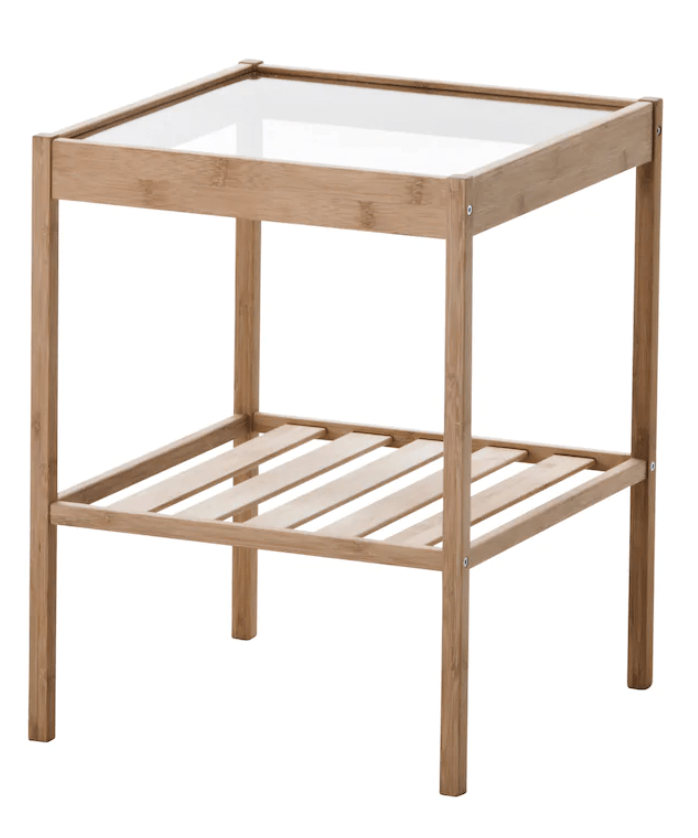
The first thing you need to build this puck display table is the table from IKEA. This hack is centered around the Nesna Nightstand, a cute little table that’s SO affordable — $20 or less.
The one problem about this nightstand? It’s not available in the US (yet).
I know. I’m sorry! It’s the worst to feel like you have the perfect solution for a problem but are missing the piece to make it happen. We were fortunate enough to be visiting Canada and stopped by an Ikea there to pick it up. You may be lucky enough to find it in the states for a decent price on Amazon or Ebay, but if not, hopefully this tutorial can inspire you to come up with a solution that might work for another piece of furniture you have (this ikea table might work if your space has a more coastal vibe)!
But, if you’re able to get your hands on the Nesna nightstand, this is the perfect hack for turning it into a cute hockey puck display table.
2. Sheet of 1/8″ Hardboard
This will act as the base underneath the glass top of the table where the pucks will sit. Hardboard is super affordable and can easily be found at your local hardware store, or even on Amazon. You’ll need to get the hardboard cut to the size of the table, but they’ll happily do that for you there!
3. Tiny Nails

You’ll need super small nails to hammer the hardboard into place around the edge of the table. We grabbed these at our hardware store for cheap but you can grab some on Amazon too!
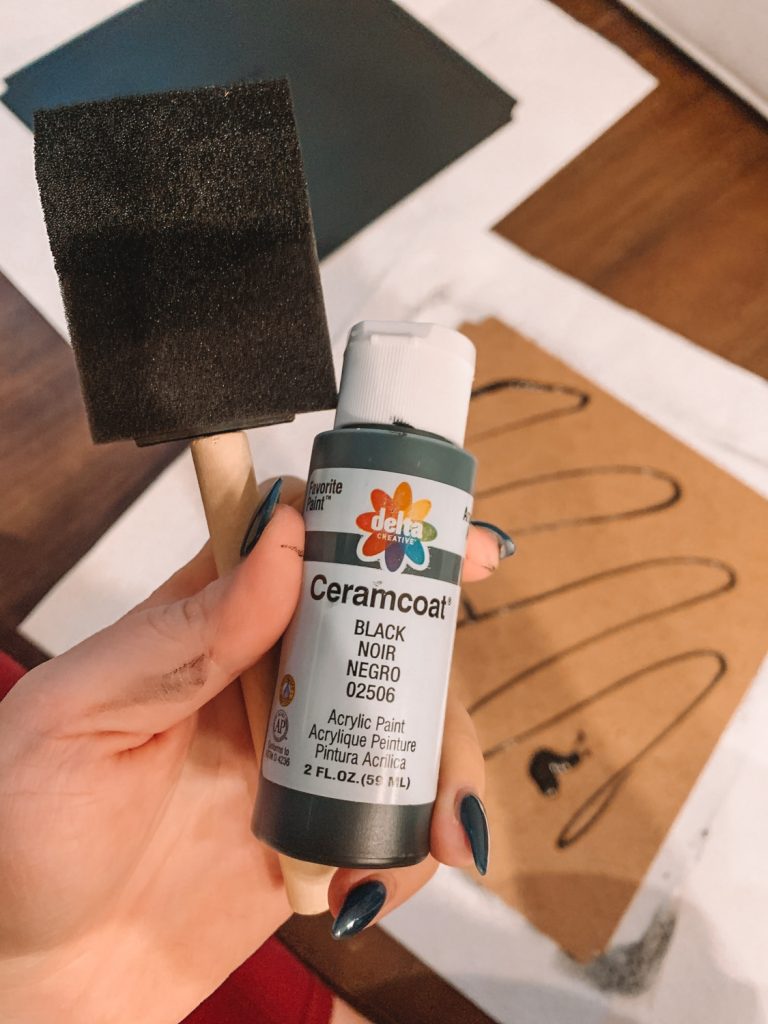
4. Black Acrylic Paint and Brush
I used an old tube of dollar store black acrylic paint I had lying around. You should also grab a cheap foam paintbrush to apply.
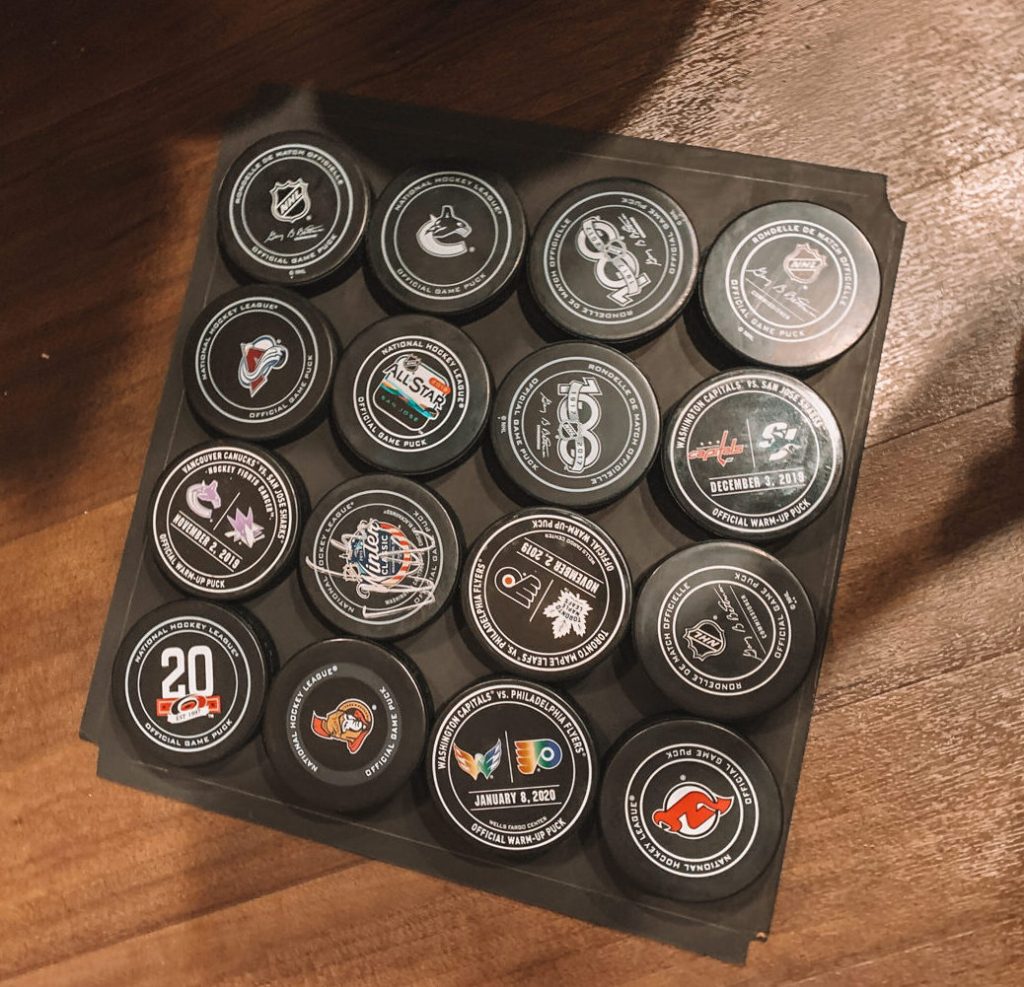
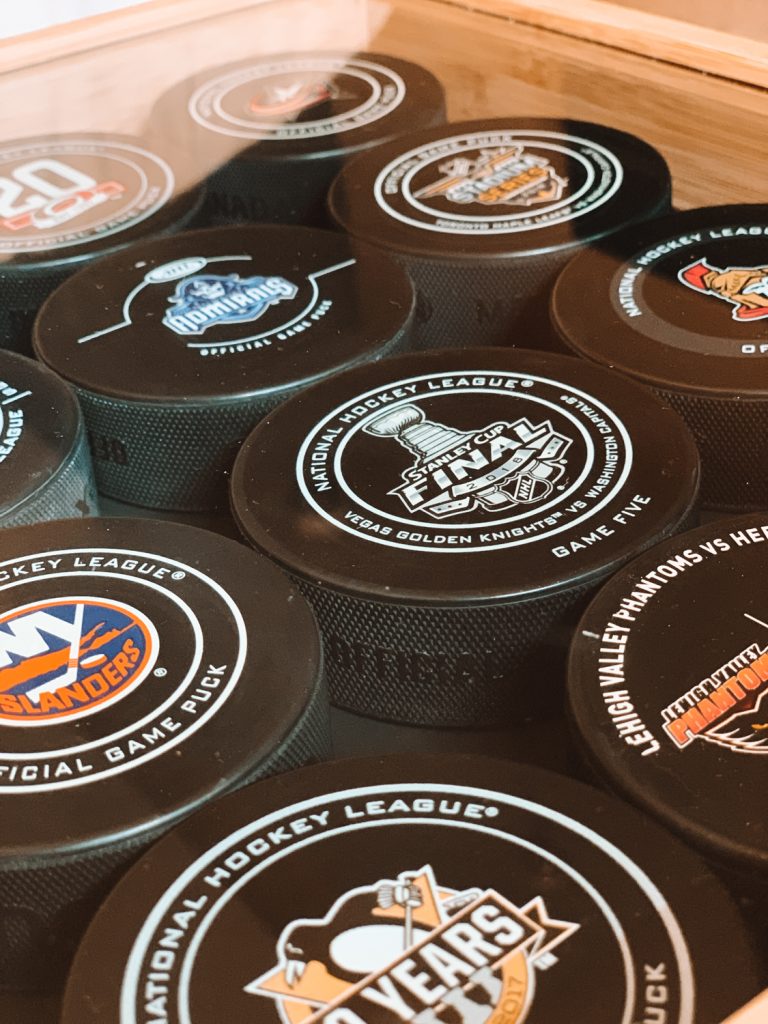
5. Hockey Pucks
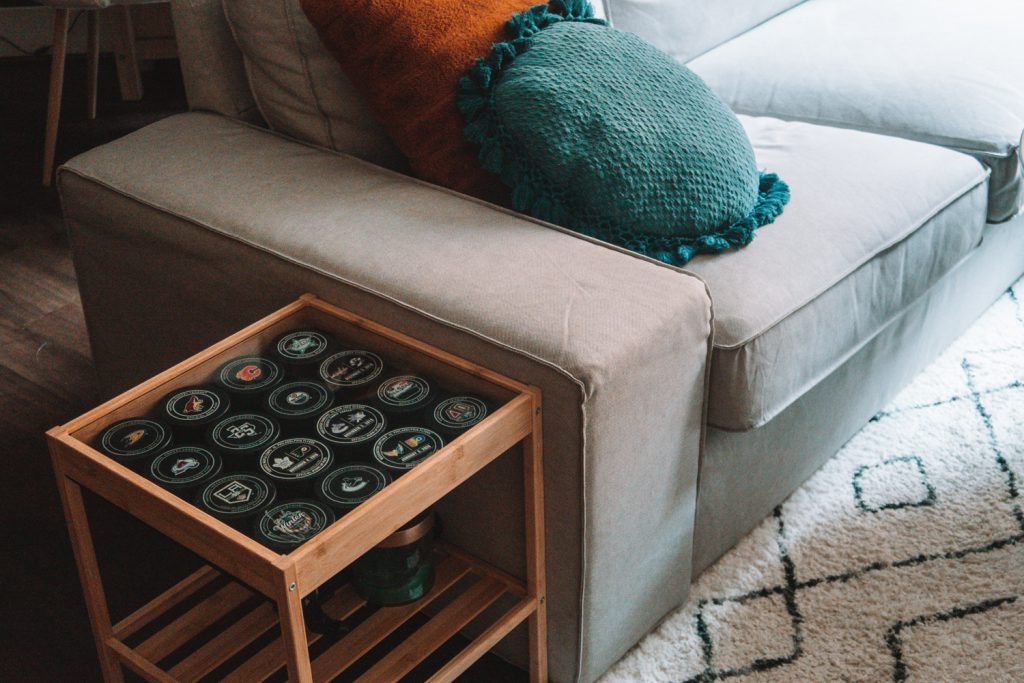
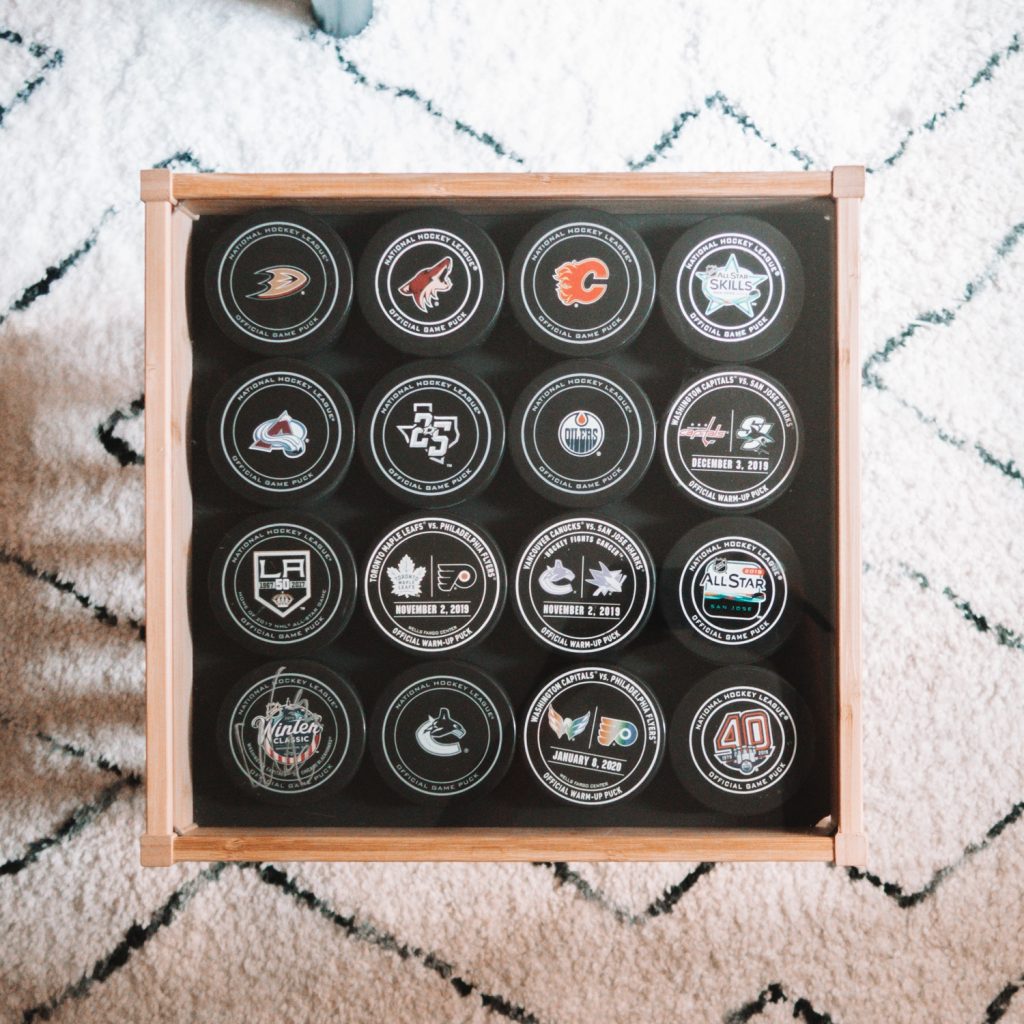
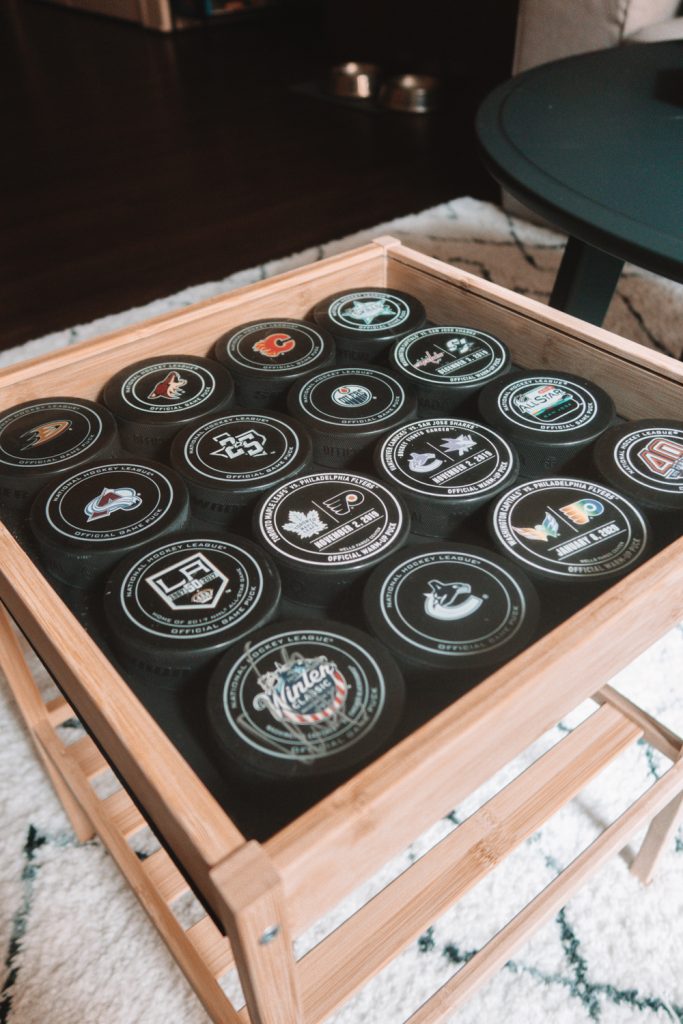
The last thing you need is your pucks! You need 16 pucks for each table, as you’ll lay them out in a 4 by 4 pattern. I recommend collecting them the fun way — going to games!
Building Your DIY Hockey Puck Display Table
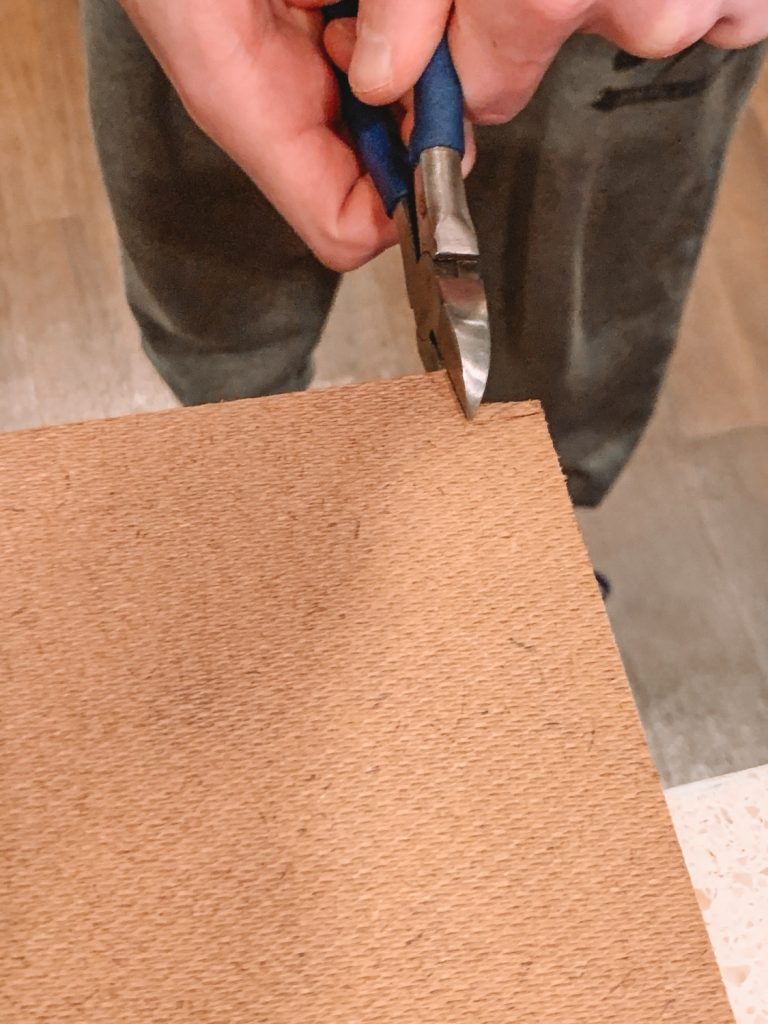
Before you get started building, you’re going to want to get your hardboard cut to size. If you’re working with a smaller sheet you ordered online, you can do this at home with a box cutter, but for us it was easier to just have them cut it at the store. You can find anyone in your hardware store and they’ll be happy to help you!
You want your hardboard cut to the same size as the top of the table, as it’s going to sit directly below the top to create a shadowbox kind of effect. We measured our table in advance to be exact, but your hardboard should measure something around 14″x13″.
Once you get home, build your table according to the instructions. The whole thing. Don’t worry, we’re going to take it apart!
Take your hardboard and lay it on top of the table. To accomodate for the legs of the table, we’re going to have to cut notches in the corners of the hardboard. Use a pencil to outline where the legs will be on your hardboard, then use a box cutter, scissors, saw, wire cutter — basically anything you have on hand to cut out those corners. This does not have to be perfect, and it probably won’t be!
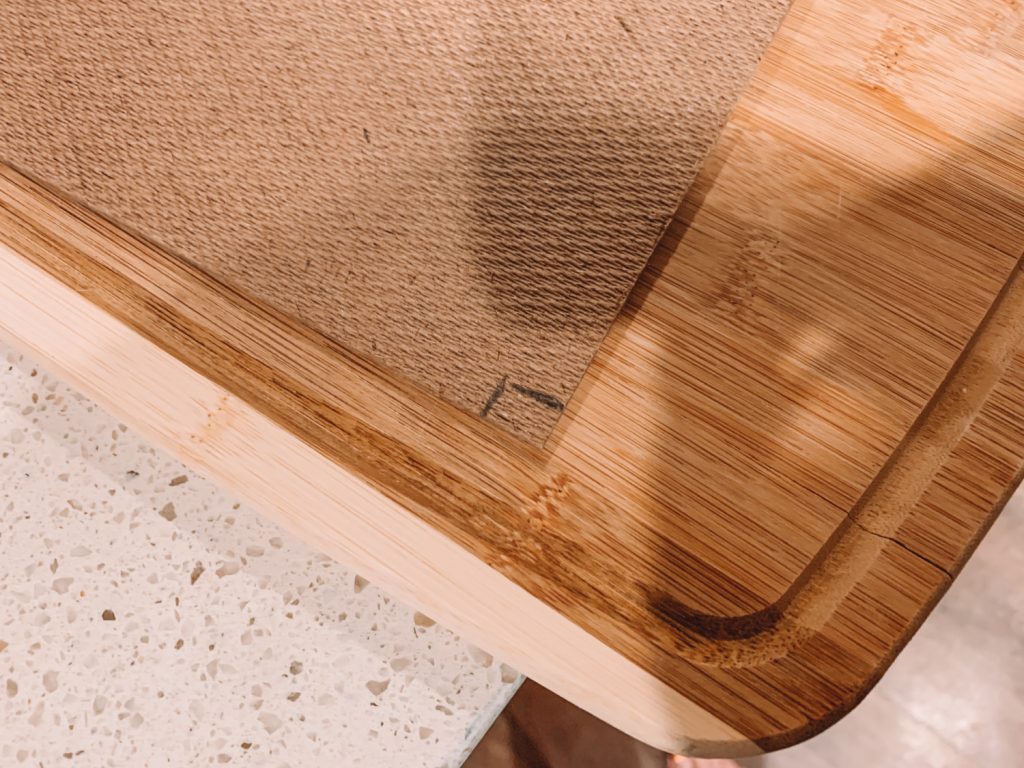

Once you have the corners cut, take the hardboard and slide it up under the table, making sure it fits snug under the top. If you need to modify the notches, make those adjustments before moving forward.
When the hardboard is the right size, paint the smooth side with your black acrylic paint. If you’re not actually filling this table with pucks, you can totally paint it any color! We used black because we thought it would look nicest with the pucks.
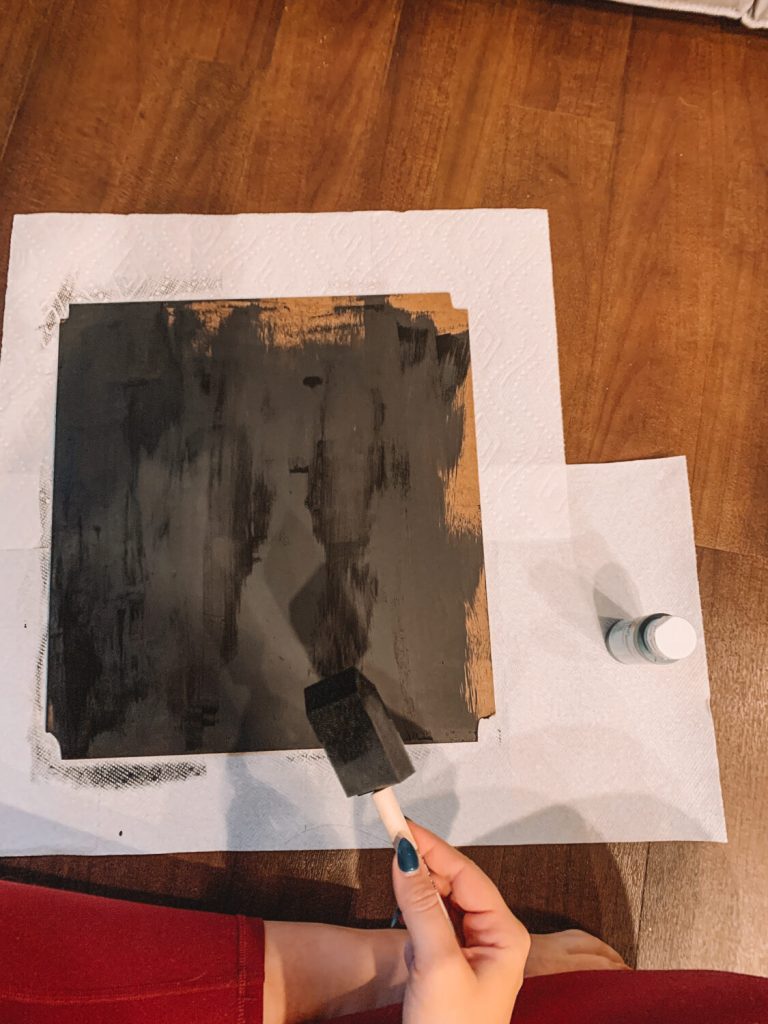
After the paint is dry, disassemble the last side of the table (just undo the last step of the instructions), so the table has all but three sides available. Remove the glass and lay it centered on top of the painted side of the hardboard. Lightly trace the glass — you can use this guide to help determine where to place your pucks on the board.
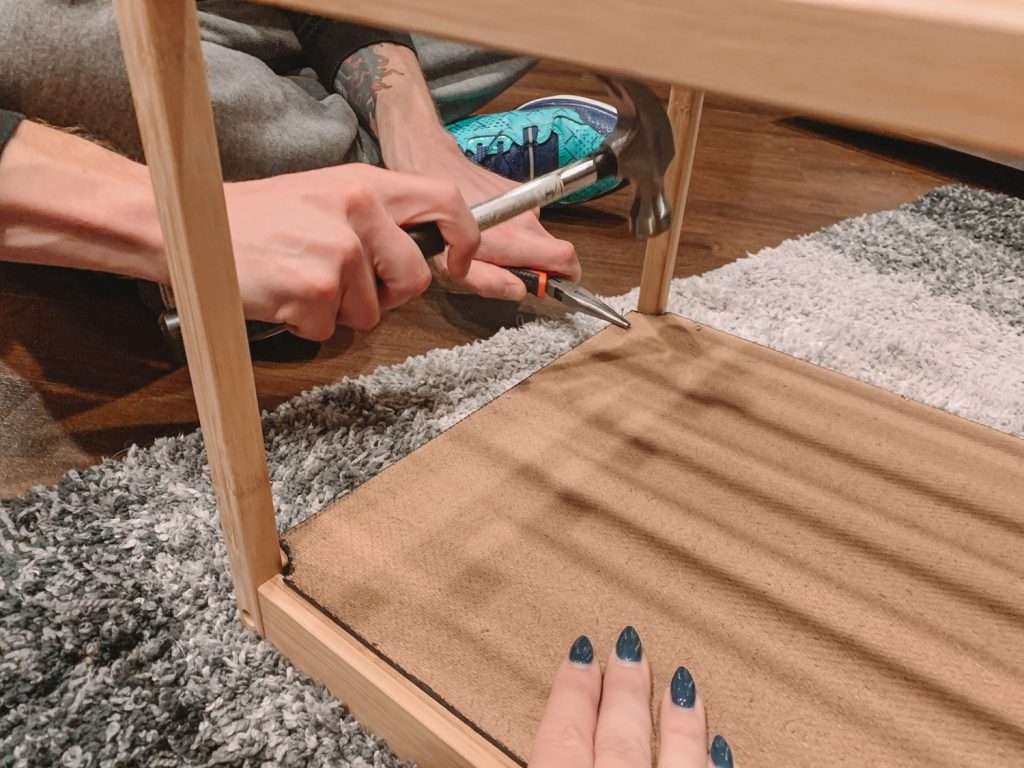
With the glass still out and the table disassembled, flip it upside down on a soft surface, like a rug. Lay the hardboard on top of it, black side facing where the glass would be, and use the tiny nails to nail the hardboard to all three edges of the coffee table as shown. You may need some pliers to hold the nails in place.

Flip the table back over (use some books to prop it up), and start filling in your pucks! We were thinking we’d have to add small dowels or something in order to keep the pucks in place and not slide around, but the rubber has enough traction against the acrylic paint that they actually stay pretty well where they should be.
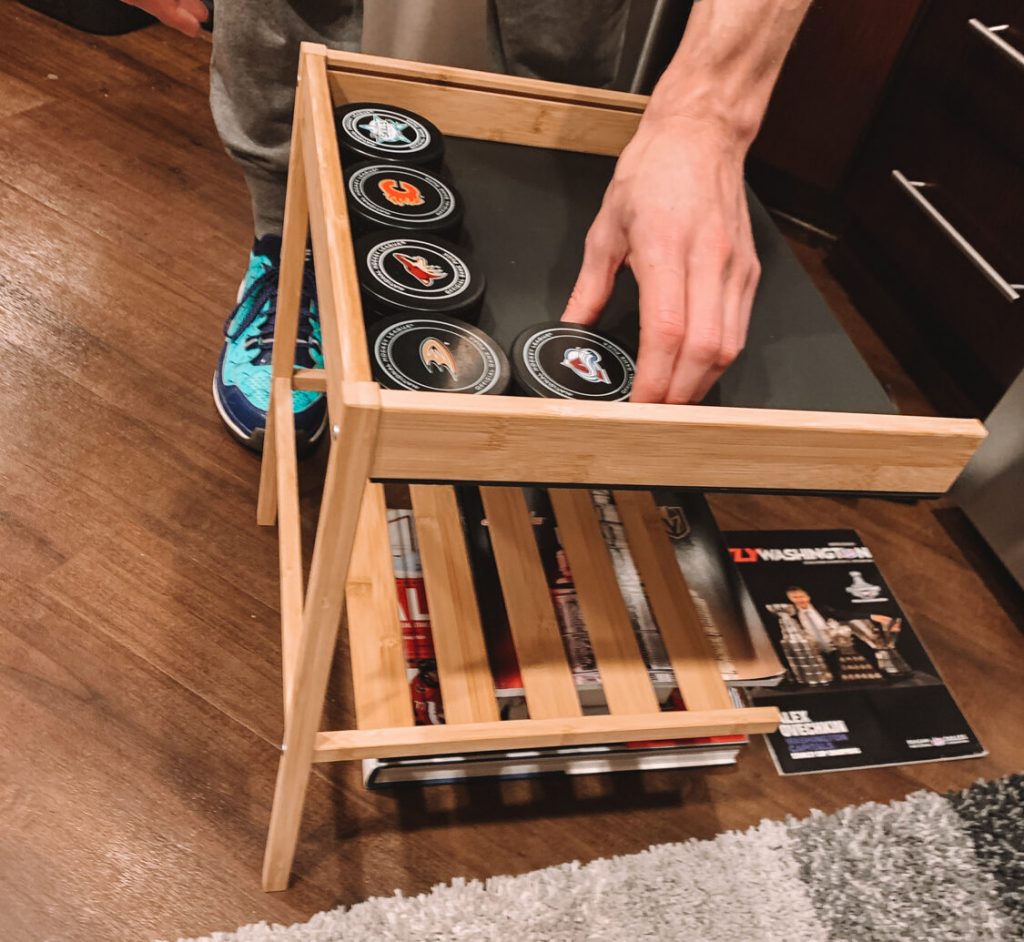
Finally, replace the glass and reassemble the last side of the table. With the table still right side up, tap in a few nails to the last edge (don’t go too crazy, as you’ll have to remove all of these if you ever want to change or add pucks later).
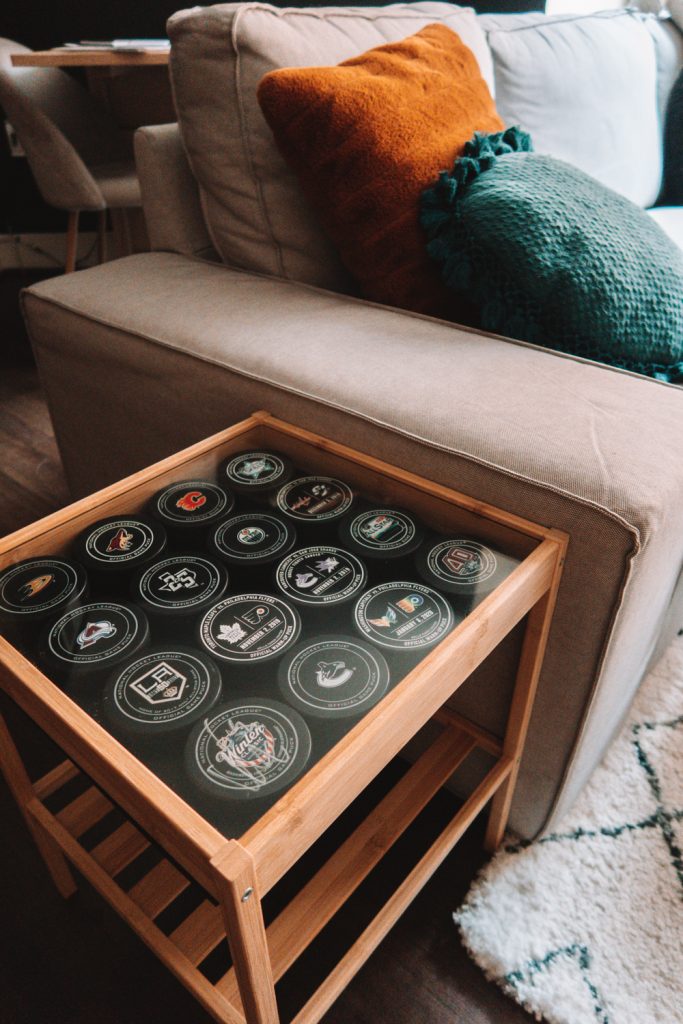
Now you have your own DIY hockey puck display table!
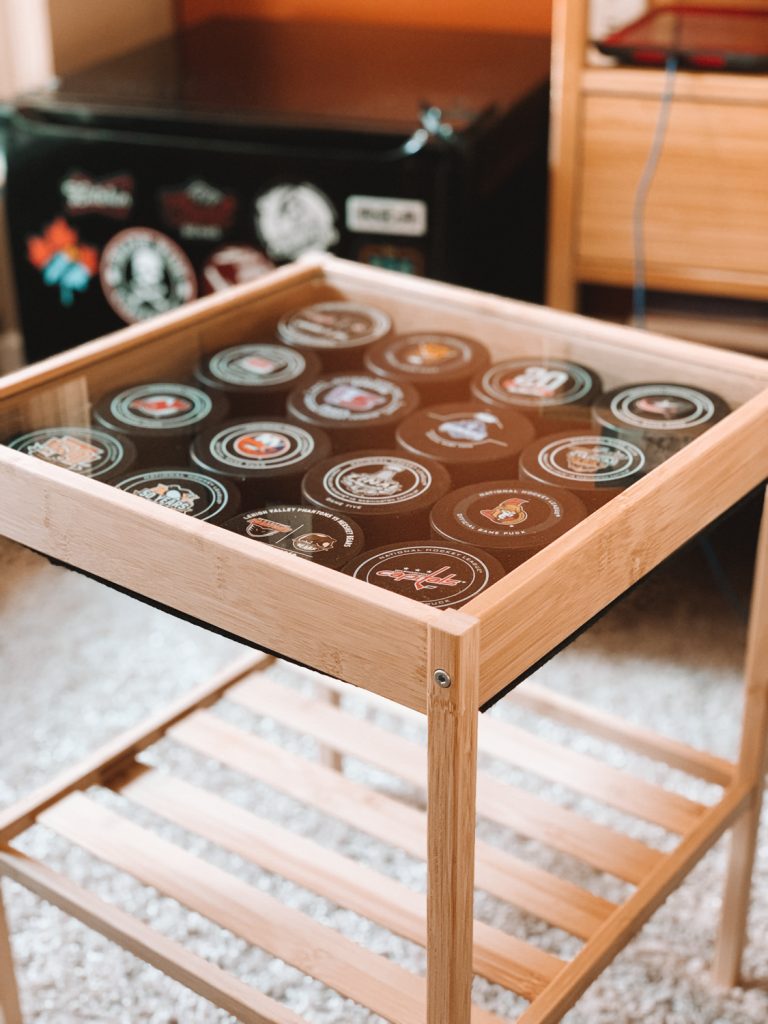
We wound up buying two tables and have the plan to fill them with eastern conference and western conference teams, once we collect all the pucks. I’m personally so proud of this DIY and honestly think it’s such a cute way to show off how much we love hockey without dragging down the appearance and vibe of our home. From the side, they look so chic and normal, and I love that from the top they add a personal touch that really feels like “us.”
I hope this tutorial was helpful! I know I searched high and low to find a way to hack an Ikea table into a shadowbox display table for hockey pucks and I really feel like this was such an easy way to make it happen. Let me know if you wind up building your own by commenting below or tagging me on Instagram @GoForKady.